Sizing Them Up
Can you put these shapes in order of size? Start with the smallest.
Problem
Arrange these shapes in order of size. Put the smallest first.
How are you deciding on the order?

Kelsey said:
"I printed the shapes and then measured the length of each shape at the longest point."
Louise and Rosie said:
"We observed the area of each and tried to rearrange the shapes in our heads to compare them."
Thomas said:
"I cut out the shapes then cut each up into little pieces and laid them on top of each other to see which was bigger. I also put them on a grid with small squares and counted the number of squares for each."
Can you take each of these starting ideas and develop it into a solution?
You may be interested in the other problems in our Celebrating Solutions Feature.
Getting Started
How are you going to decide which is smallest?
How about cutting the shapes out from this sheet?
Student Solutions
Juliet from Halstead Prep School wrote:
I printed the shapes and traced them on squared paper. Then I counted the squares inside each shape. I counted half and whole squares. I found two 16s and arranged them in order from 11 to 20. Please see the picture:

Luay from Goldsworth Primary School sent the following:
1. I printed out the shapes and cut them.
2. I drew the shape on a square grid paper by placing the cut-out shape on it and drawing around it.
3. I put dots in each square inside the shapes so I could count them.
4. I wrote down the total counts of each shape.
5. Finally, I arranged the numbers in order starting from lowest to highest. Lowest number means smallest in size and highest number means the largest in size. I have attached a picture for reference:

We had three submissions from Lutton St. Nicholas:
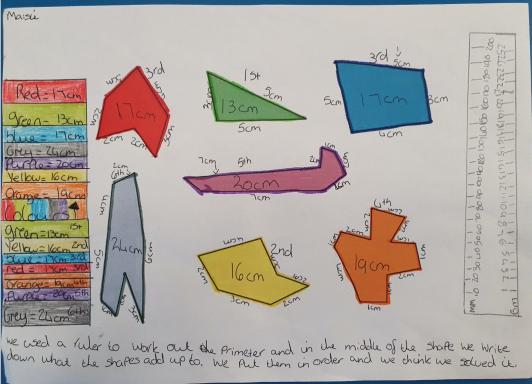
Maisie
We used a ruler to work out the perimeter and in the middle of the shape wrote down the total in the middle.
Then we put them in order from smallest to largest.
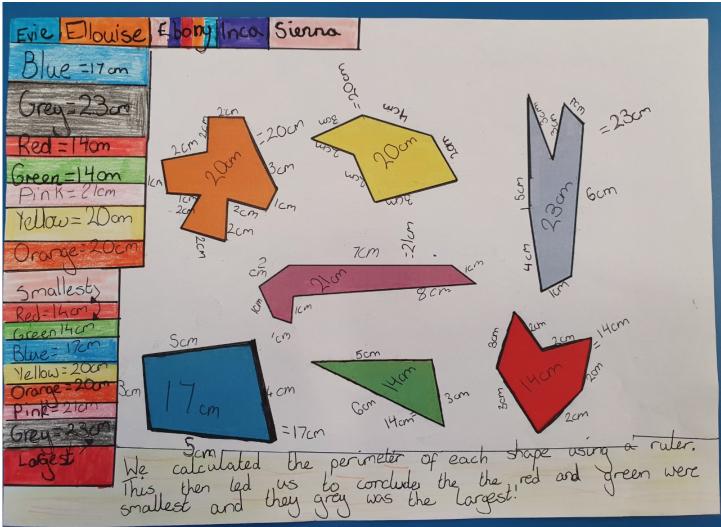
Evie, Ellouise, Ebony, Inca, Sienna
We calculated the perimeter of each shape using a ruler. This then led us to conclude the red and green were smallest, and the grey was the largest.
Kacey, William, Mikey
We traced the shapes on a squared piece of paper and counted the squares to find the area. Then we ordered them from smallest to largest.
We had the following pictures of solutions from The International School of Brussels:
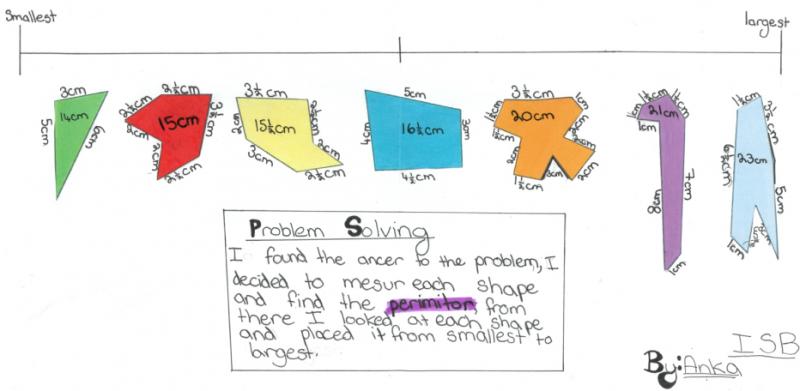
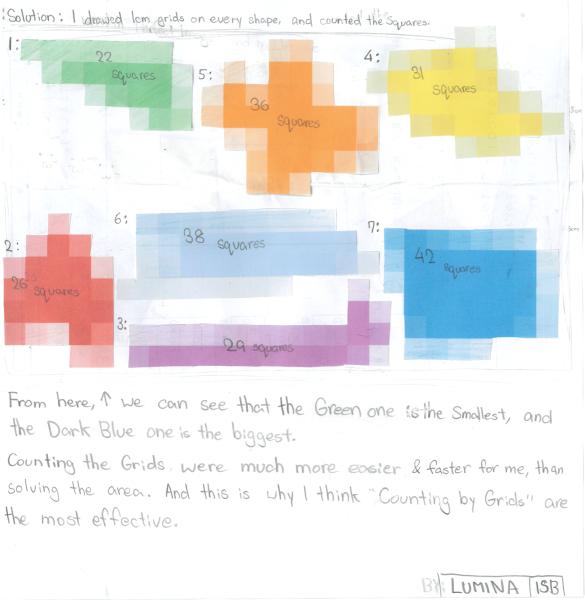
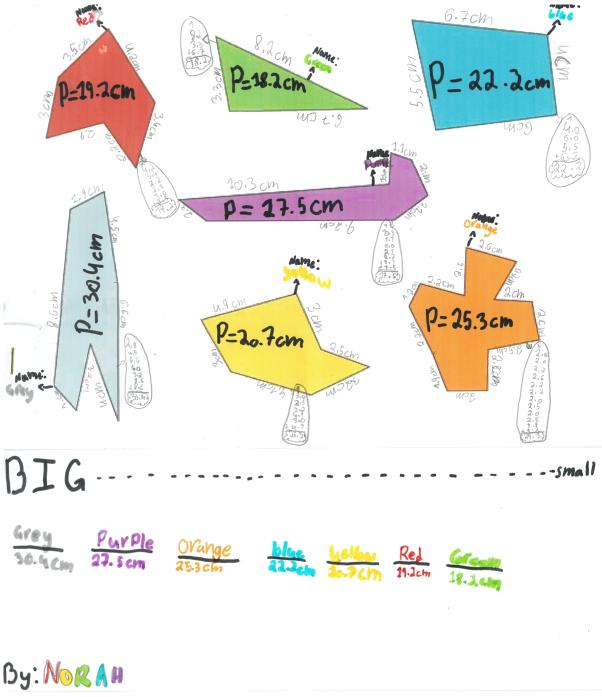
Thank you for these. I wonder if there are any other ways of assessing their sizes...
Teachers' Resources
Why do this problem?
This low threshold high ceiling activity is designed to help children begin to understand the meaning of area as a measurement of surface. It gives them a chance to choose and then justify a way of measuring. It can be solved in many different ways and the sample approaches offer a basis for discussion of possible different methods.
Possible approach
This problem featured in an NRICH Primary webinar in November 2021.
This activity is deliberately open to encourage children to try to define "smallest" for themselves. At this level, the important point is to be able to explain and justify a particular order, rather than there being any right or wrong way to do it. Children might use criteria such as length, height or perimeter, for example. The activity could lead into the introduction of the concept of area, (even if the word "area" itself is not used).
Once you feel that most learners have made progress and understand the problem well (this does not necessarily mean that they have found a 'final' solution), give out this Word document or this pdf. Suggest to the class that when they've finished or can't make any further progress, they should look at the sheet showing three approaches used by children working on this task. Pose the question, "What might each do next? Can you take each of their starting ideas and develop them into a solution?". It might be appropriate to read through each method as a whole class before giving pairs time to work on each one. Alternatively, you may prefer to allocate a particular starting point to each pair.
Allow at least fifteen minutes for a final discussion. Invite some pairs to explain how the three different methods might be continued, using the interactivity to keep track of the order that the pairs describe. You may find that some members of the class used completely different approaches when they worked on the task to begin with, so ask them to share their methods too. You can then facilitate a discussion about the advantages and disadvantages of each. Which way would they choose to use if they were presented with a similar task in the future? Why?
Key questions
How are you going to decide which is smallest?
Possible extension
Children could be asked to cut out shapes which they think are 'the same size' but which are very different shapes from those given.
Possible support
Some children might benefit from cutting out the shapes from this sheet and putting them one on top of another to aid comparison (laminating them may help prolong their life!).
